
Update (11/04/2019):
There have been several public reports of active exploitation of CVE-2019-0708, commonly referred to as “BlueKeep.” Preliminary reportsindicate that the vulnerability is being exploited by adversaries who are leveraging access to compromised systems to install cryptocurrency mining malware. At this time, there has been no evidence to suggest that the exploitation is due to the emergence of a new worm, and it is likely being done as part of a mass exploitation campaign, similar to what we have seen in previous instances of mass exploitation campaigns. Existing coverage for BlueKeep continues to be an effective way to mitigate possible exploitation attempts. For additional information related to protecting against attacks leveraging BlueKeep, please refer to the blog posts here.
Note: This post was originally published on 09/03/2019.
This blog was authored by Brandon Stultz, Holger Unterbrink and Edmund Brumaghin.

Executive summary
Over the past few months, Microsoft has released several security updates for critical Remote Desktop Protocol (RDP)-related security bugs. These bugs are significant for IT infrastructure because they are classified as "wormable," meaning future malware that exploits them could spread from system to system without requiring explicit user interaction. These vulnerabilities could be exploited by an attacker sending a specially crafted request to the target system's Remote Desktop Service via RDP. We have seen how destructive these kinds of attacks can be, most notably WannaCry. We highly recommend organizations immediately apply Microsoft's patches. Cisco Talos released detection coverage for CVE-2019-0708 and also enhanced guidance to help organizations facilitate inspection of RDP sessions here. Microsoft published additional security updates last month to mitigate two additional remote code execution vulnerabilities, CVE-2019-1181 and CVE-2019-1182, affecting several versions of Microsoft Windows. These bugs are referred to as "DejaBlue" due to their similarities to BlueKeep.
Once again, Cisco Talos started working immediately to reverse-engineer the RCE vulnerabilities. Protections for both CVE-2019-1181 and CVE-2019-1182 now exist to keep your systems secure. SID 51369 for SNORT® correctly blocks exploitation of CVE-2019-1181 and CVE-2019-1182. In this post, we'll run through the details of how to protect against this "DejaBlue" exploit and walk through the steps to protect your environment.
Remote Desktop Services remote code execution vulnerability (CVE-2019-0708)
This vulnerability was originally published in May 2019, and is often referred to as "BlueKeep." It is a pre-authentication vulnerability, meaning that an attacker could attempt to exploit it without first having to authenticate to the affected system with valid credentials. Microsoft released a security advisory regarding this vulnerability and has repeatedly urged organizations to apply the corresponding security update to systems to mitigate the threat of attacks targeting it.
Significant research has taken place over the past few months with many researchers working to successfully develop an exploit payload. Working remote code execution exploits have now been developed, although none have been publicly released at this point. As such, organizations should ensure their systems are updated as soon as possible to ensure that their systems are no longer affected by this vulnerability. In situations where security updates cannot be applied, organizations should leverage Network Level Authentication (NLA) functionality available within Microsoft Windows and limit exposure by restricting access to RDP servers from the internet.
Remote Desktop Services remote code execution vulnerability (CVE-2019-1181, CVE-2019-1182)
Microsoft published additional security updates last month to mitigate two additional remote code execution vulnerabilities affecting several versions of Microsoft Windows. Similar to what was described for CVE-2019-0708, these vulnerabilities are also pre-authentication and do not require any explicit user interaction to successfully compromise affected systems. Microsoft released guidance bulletins for CVE-2019-1181 and CVE-2019-1182 and recommends that organizations ensure their systems are updated as quickly as possible. In addition to installing the security updates, the bulletins specify that enabling NLA on affected systems could be used to provide partial mitigation as this will require attackers to authenticate to RDP servers prior to being able to reach the exploitable condition.
Using Firepower to defend against encrypted DejaBlue
Like BlueKeep, protection for DejaBlue requires RDP decryption. The following is a guide on setting up RDP decryption with Cisco Firepower. Since DejaBlue targets newer versions of Windows, this guide specifically applies to Windows Server 2019. For older versions of Windows, refer to the guide we previously wrote for BlueKeep.
Note: This procedure requires an inline Firepower device that supports SSL decryption. For more information visit Cisco Next-Generation Intrusion Prevention System (NGIPS).
Steps for RDP Decryption:
1. Determine the certificate used by the RDP server.

In Windows Server 2019, RDP TLS certificates are configured in the Server Manager.
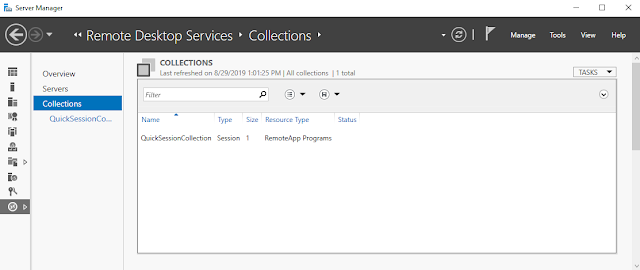
Click on "Remote Desktop Services" and then "Collections." Click on "Tasks" in the upper right hand corner and then select "Edit Deployment Properties."
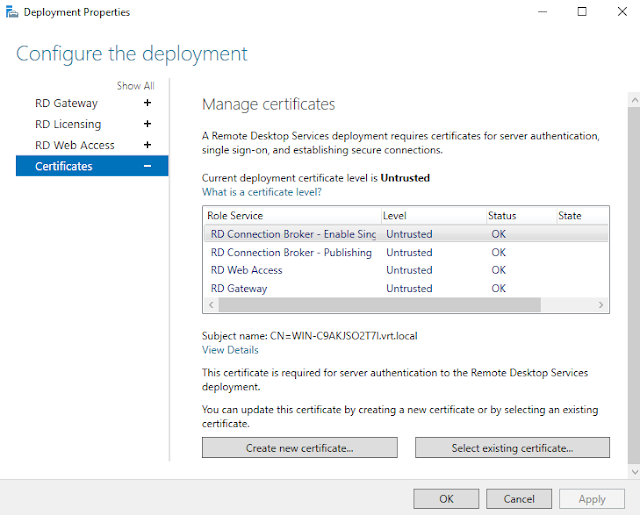
Click "Certificates."
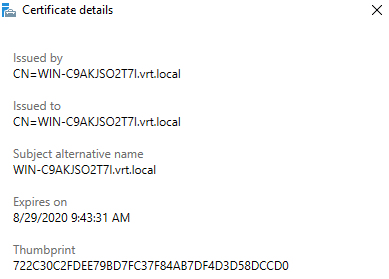
Under "Certificates," click on "View Details" under the Certificate Subject Name.
Note the certificate Thumbprint. This is the TLS certificate used in the RDP deployment.
2. Export the RDP certificate and private key:
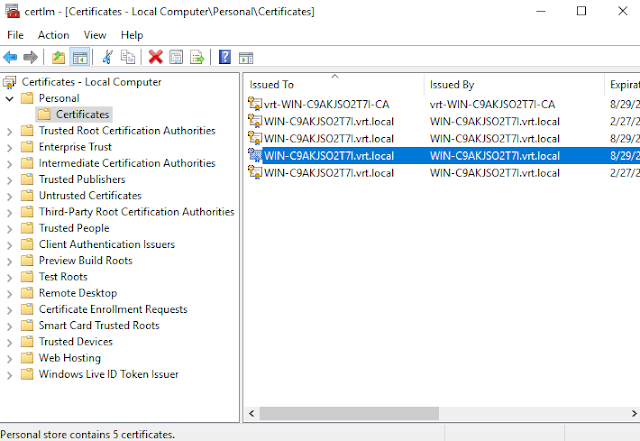
Open "Run" and then type "certlm.msc."

Locate the certificate that matches the thumbprint from Step 1.
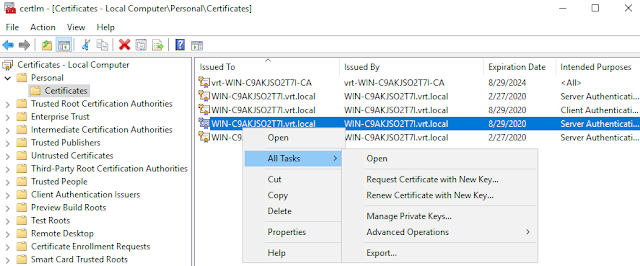
Right click on the Certificate. Under "All Tasks" click on "Export…"
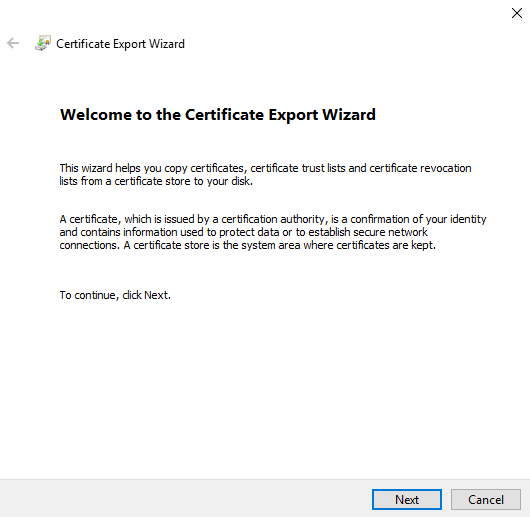
In the Export Wizard, click Next.
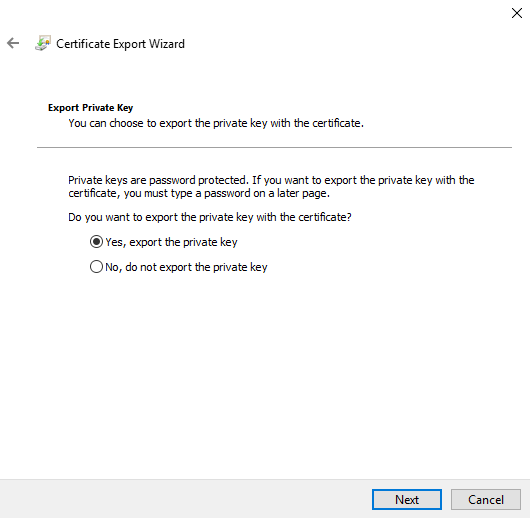
Click on "Yes, export the private key."
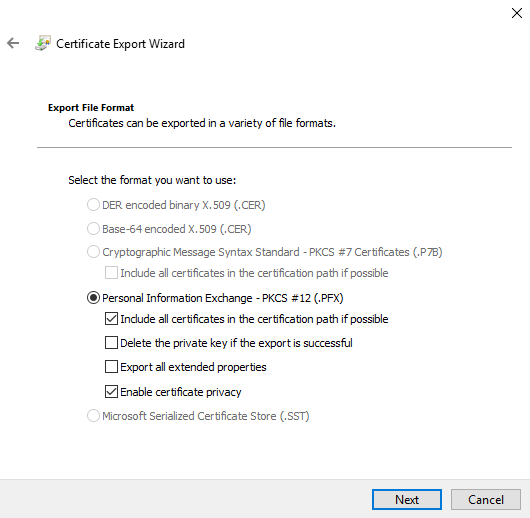
Make sure "PKCS" is selected.
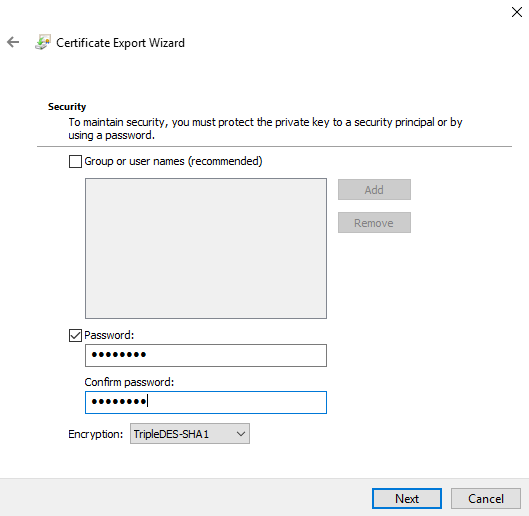
Click on "Password" and then enter a password to encrypt the private key.
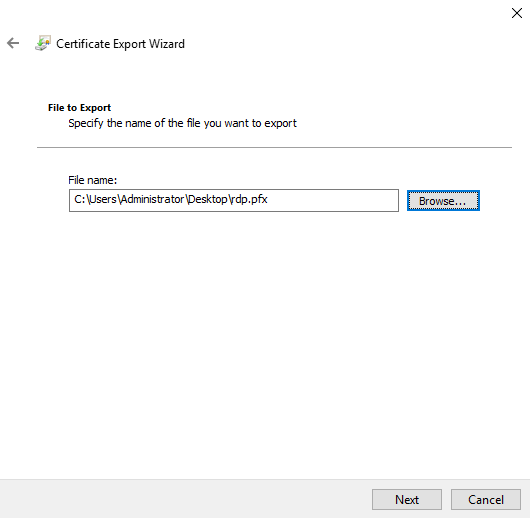
Type in a file name for the PFX file and click "Next."
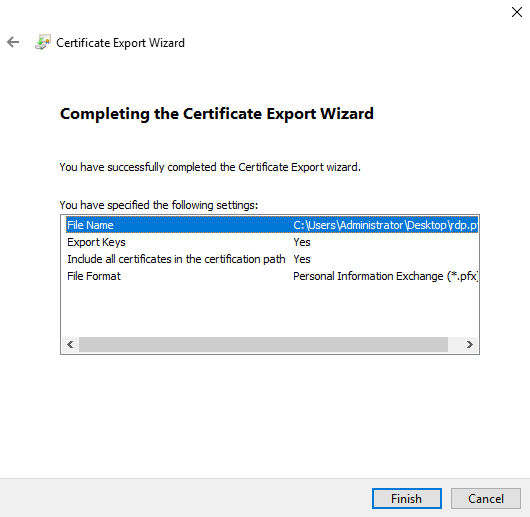
Finally, click "Finish."
You have successfully exported the RDP certificate and private key.
3. Configure Windows ciphersuites for Firepower.
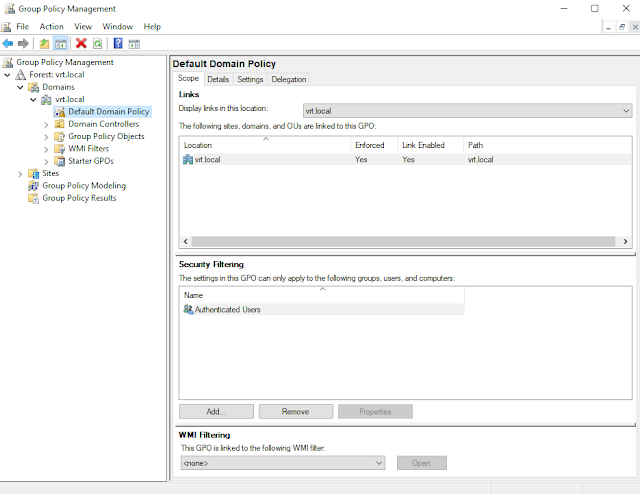
Open Group Policy Management.
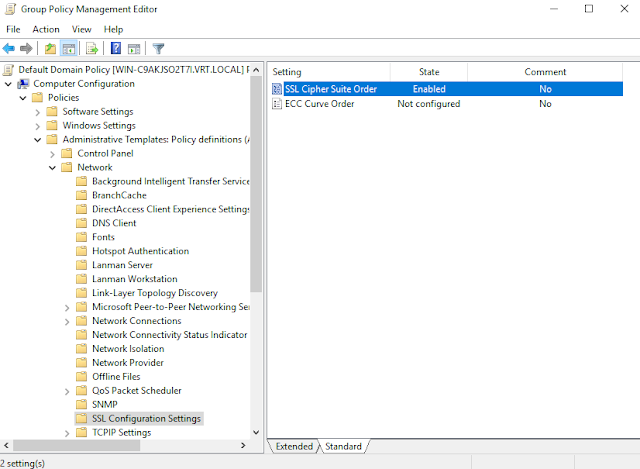
Right click on your organization's group policy and click "Edit."
Navigate to: Computer Configuration -> Policies -> Administrative Templates -> Network -> SSL Configuration Settings. Click on SSL Cipher Suite Order.
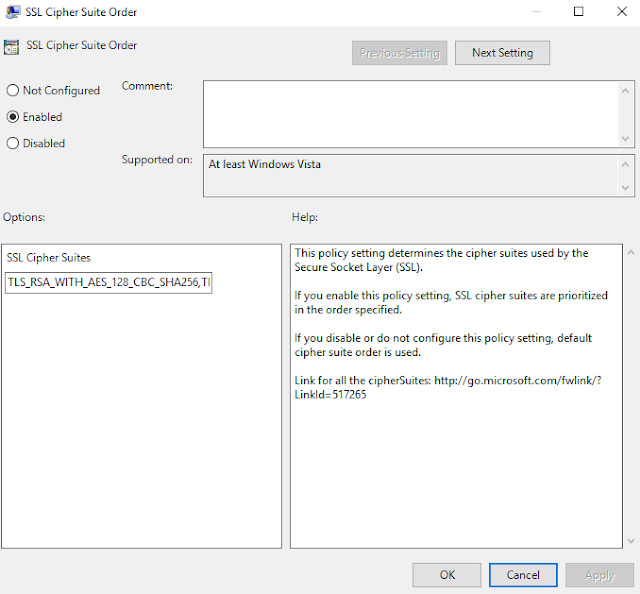
Set the option to "Enabled" and paste in a set of Ciphersuites Firepower supports for static key decryption:
TLS_RSA_WITH_AES_128_CBC_SHA256,TLS_RSA_WITH_AES_128_CBC_SHA,TLS_RSA_WITH_AES_256_CBC_SHA256,TLS_RSA_WITH_AES_256_CBC_SHA,TLS_RSA_WITH_RC4_128_SHA,TLS_RSA_WITH_3DES_EDE_CBC_SHAClick OK. The RDP host should now be set up.
Now to prepare the RDP certificate and private key for the Firepower appliance.
4. Prepare the RDP certificate and private key for Firepower.
For this step, you will need the OpenSSL tool and the PFX file exported in Step 2 (rdp.pfx, in this example).
Extract the RDP certificate from the PFX file:
$ openssl pkcs12 -in rdp.pfx -clcerts -nokeys -out cert.pem
Enter Import Password:
This command will ask for the import password — this is the password we typed in on Step 2.
Extract the RDP private key from the PFX file:
$ openssl pkcs12 -in rdp.pfx -nocerts -out key.pem
Enter Import Password:
Enter PEM pass phrase:
Verifying - Enter PEM pass phrase:
The above command will ask for the import password again, as well as a PEM passphrase. Remember this private key passphrase, we will need it when we add the RDP certificate to Firepower.
5. Import the RDP key into Firepower.
At this point, you should have the RDP cert "cert.pem," as well as the encrypted RDP private key "key.pem."

Navigate to Objects -> Object Management.
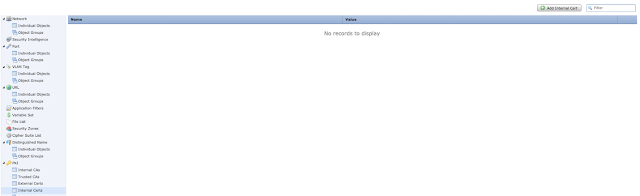

Select "Add Internal Cert" on the top right.
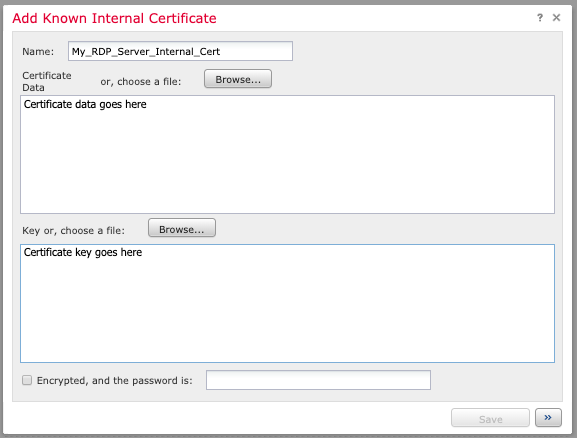
Name the certificate (e.g. the server name) and either paste in "cert.pem" or browse to the "cert.pem" file in the "Certificate Data" section. Do the same for "key.pem" in the "Key" section. Click the "Encrypted" box and type in the PEM passphrase from Step 4.
You have successfully imported the RDP certificate and private key. Now to create a SSL policy for decryption.
6. Create an SSL Policy
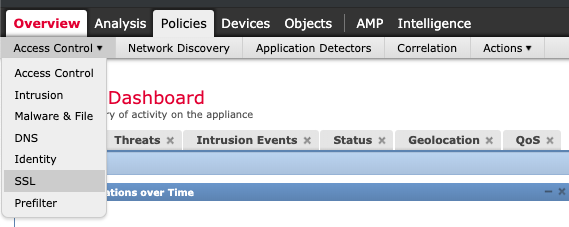
Navigate to Policies -> SSL
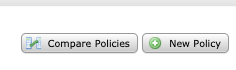
Select "New Policy."
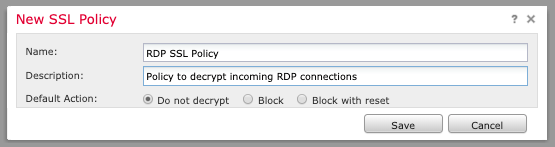
Enter a policy name and description with default action "Do not decrypt."

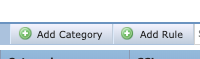
Once the policy editor has loaded, select "Add Rule" (top right).
Name the rule and give it the Action "Decrypt - Known Key". Click the "with" field and select the certificate you imported earlier in Step 5.
If applicable, select Source and Destination networks or leave them as "any."
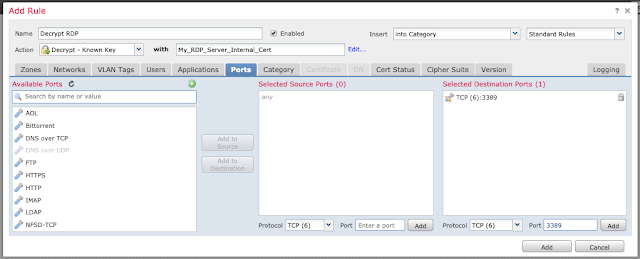
Click on the "Ports" tab and input the TCP port 3389 (if appropriate for your environment) under "Selected Destination Ports" and click "Add."
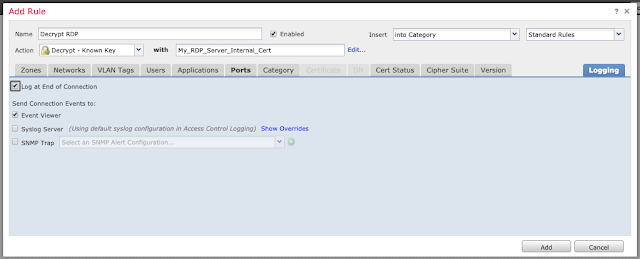
Under the "Logging" tab, enable logging at the end of the connection if desired.
Click "Add" and then "Save" to save the rule.
Additional SSL documentation is available here.
6. Enable the Intrusion Prevention Rule for DejaBlue.
Navigate to Policies -> Access Control -> Intrusion Prevention.
Edit the desired Intrusion Policy.
Filter for Snort ID 51369: "OS-WINDOWS Microsoft Windows RDP DecompressUnchopper integer overflow attempt."
Click the checkbox and select Rule State -> Drop and Generate Events.
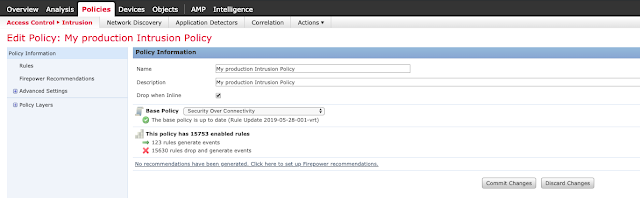
Click "Policy Information" and commit changes.
7. Configure the Access Control Policy
Navigate to Policies -> Access Control and edit the relevant Access Control Policy.
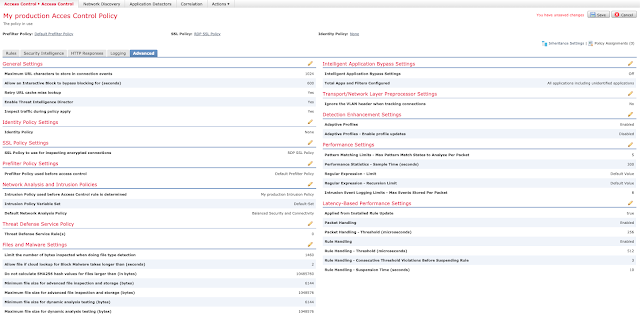
Under the "Advanced" tab, edit "SSL Policy Settings."
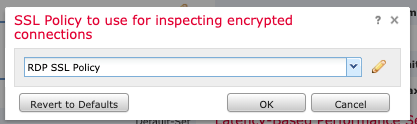
Select the SSL Policy we created in Step 5 and click OK.

Ensure that your Intrusion Prevention Policy is selected under "Intrusion Policy used before Access Control rule is determined" within the "Network Analysis and Intrusion Policies" section of the "Advanced" tab.
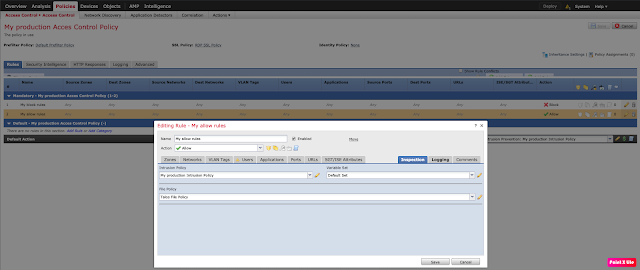
Under the "Rules" tab of your Access Control Policy, ensure you have an appropriate Intrusion Policy set for any "Allow" rules.
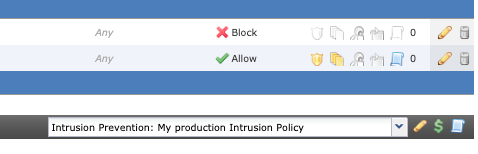
If appropriate, enable the Intrusion Prevention Policy for your Default Action, as well.
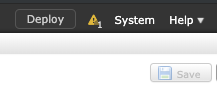
Save and deploy changes. Verify RDP connectivity and functionality.
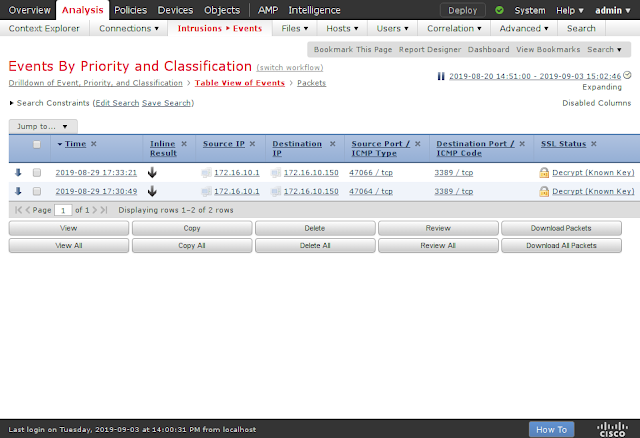
Firepower blocking the encrypted DejaBlue exploit:
Conclusion
Just as CISOs awaited the arrival of a dreaded BlueKeep worm, DejaBlue appeared on the scene to reset the clock. If exploited, an attacker could use DejaBlue to infect many machines quickly and spread malware. The WannaCry ransomware attack from 2017 is the most extreme example of how dangerous this could be. Using the steps outlined in this post, Cisco Firepower users can protect themselves from DejaBlue and BlueKeep.
Organizations need to take additional steps to ensure that services like RDP and SMB are not exposed unless explicitly required, but this does not eliminate the need for patching. This is yet another example of why patching is one of the core fundamental concepts in information security. Vulnerabilities this severe appear periodically, and organizations need to be prepared to respond in a variety of different ways. Patching takes time and making sure that you have detection and prevention in place can require varying levels of difficulty.