
This blog was authored by Brandon Stultz
Microsoft recently released fixes for a critical pre-authentication remote code execution vulnerability in Remote Desktop Protocol Services (RDP). Identified as CVE-2019-0708 in May's Patch Tuesday, the vulnerability caught the attention of researchers and the media due to the fact that it was "wormable," meaning an attack exploiting this vulnerability could easily spread from one machine to another. This was discussed at length in episode 54 of our 'Beers with Talos' podcast.
Cisco Talos started reverse-engineering work immediately to determine how exactly RDP was vulnerable. Talos wrote and released coverage as soon as we were able to determine the vulnerability condition. SID 50137 for SNORT® correctly blocks exploitation of CVE-2019-0708 and scanning attempts that leverage this vulnerability.
This rule prevents exploitation of CVE-2019-0708 by blocking any RDP connection that attempts to use the "MS_T120" virtual channel. The RDP protocol defines virtual channels that can be used to transfer different kinds of data (e.g. clipboard, audio, etc.). In addition to these client-specified channels, Microsoft creates the "MS_T120" channel in the Windows RDP system. Clients are not expected to create the "MS_T120" channel. A remote unauthenticated attacker can exploit CVE-2019-0708 by sending crafted data to this internal channel.
Since RDP servers are not aware of which virtual channels the client supports, the client provides a list of desired channels in the connect-initial packet at the start of the RDP session.
Client --> Connection Request --> Server
Client <-- Connection Confirm <-- Server
-- Optionally switch transport to TLS --
Client --> MCS connect-initial --> Server
Client <-- MCS connect-response <-- Server
It is possible to specify in the RDP connection request that the client is TLS capable. In most cases, this causes the server to switch the connection to TLS after the Connection Confirm packet. This means that Cisco Firepower will only scan the virtual channel list in the encrypted case if TLS decryption is set up for RDP.
While the aforementioned Snort rule can help protect against BlueKeep, it is still possible for attackers to carry out an encrypted attack — essentially sneaking past users and remaining undetected. Unless users set up TLS decryption for RDP on their Firepower device, there is a chance an attacker could exploit CVE-2019-0708 to deliver malware that would have the potential to spread rapidly.
The following is a guide to set up RDP decryption on Cisco Firepower. This guide specifically applies to Windows Server 2008 instances (newer versions of Windows Server are not vulnerable to BlueKeep). Additionally, Windows 7 only allows setting up a custom RDP certificate in the registry. It is possible to export the self-signed RDP certificate and private key in Windows 7 but this requires using the mimikatz tool as the private key for the auto-generated certificate is marked as "not exportable". Considering these hurdles, we focused on Windows Server 2008 for this guide.
*Note this procedure requires an inline Firepower device that supports SSL decryption. For more information, visit: Cisco Next-Generation Intrusion Prevention System (NGIPS) - Cisco.
Steps for RDP Decryption 1. Determine the certificate used by the RDP server
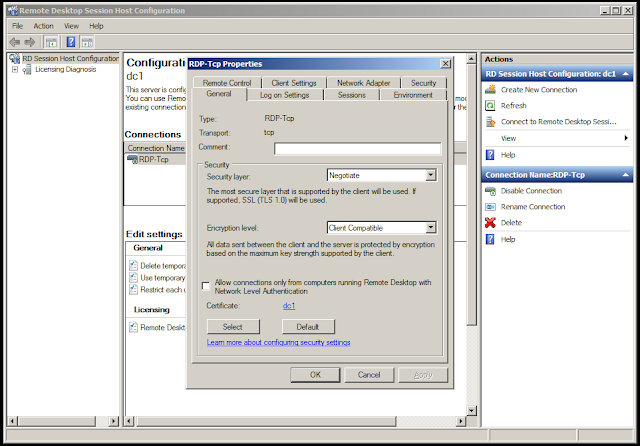
In Windows Server 2008, TLS certificates for RDP are configured in "Remote Desktop Session Host Configuration."
Once the remote desktop host configuration is opened, double-click on any RDP connections and note the certificate used by the RDP server — we will need this later.
2. Export the RDP certificate and private key
Open mmc.exe and navigate to: File -> Add/Remove Snap-in
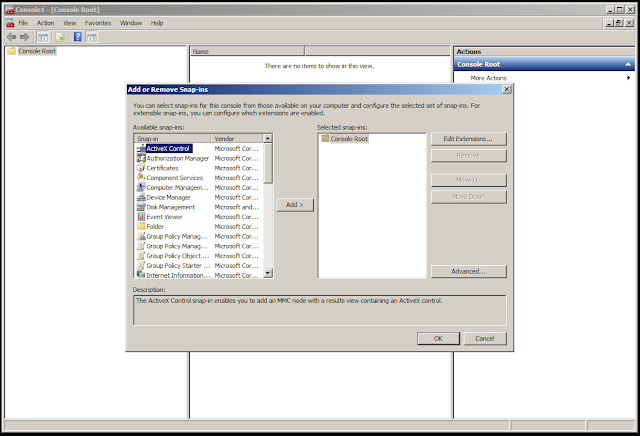
Select "Certificates" on the left and click "Add."
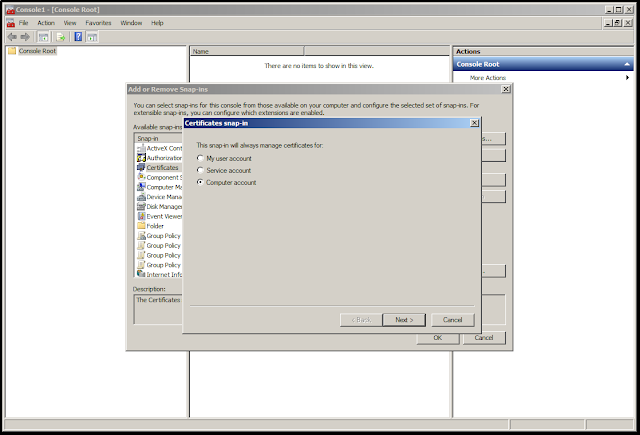
Click "Computer account," "Next," then "Finish."
Finally, click "OK" to add the certificates snap-in.

Navigate on the left to the Local Computer certificates and locate, on the right, the certificate used by the RDP server we found before in the Remote Desktop Session Host Configuration.
Right click on the certificate and in "All Tasks" click on "Export."
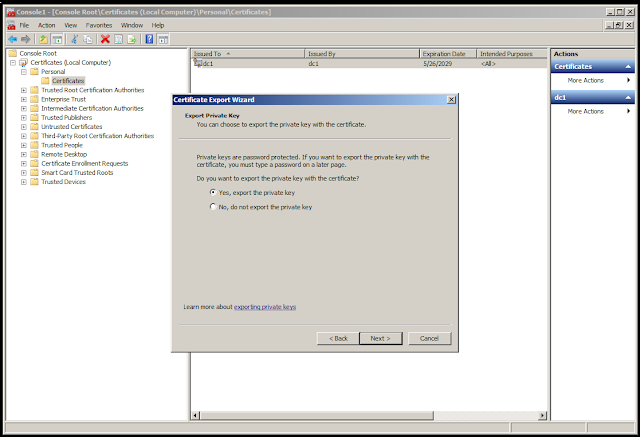
Click "Yes, export the private key" in the Certificate Export Wizard then click "Next."
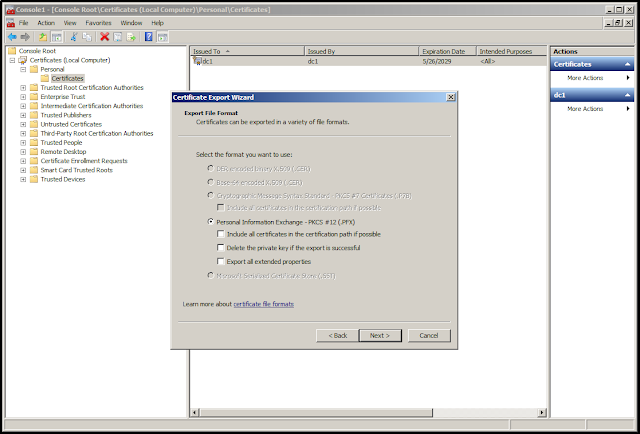
Make sure "Personal Information Exchange" is selected, then click "Next."

Type in an import password to encrypt the PFX file. Remember this password — we will need it later. Click "Next."
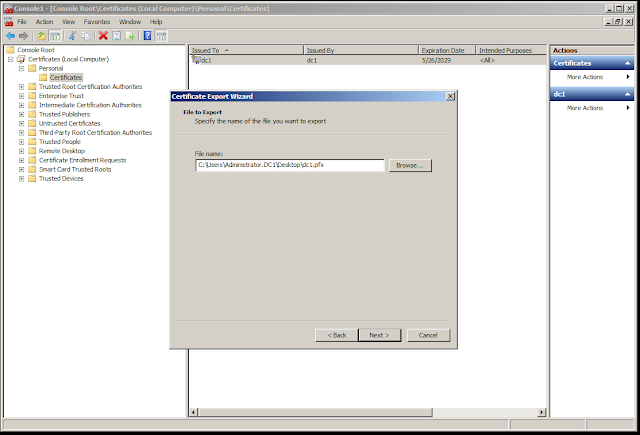
Type in a file name for the PFX file and click "Next."
Finally, click "Finish."
You have successfully exported the RDP certificate and private key.
Now, prepare them for the Firepower appliance.
3. Prepare the RDP certificate and private key for Firepower
For this step, you will need the OpenSSL tool and the PFX file exported in Step 2
(dc1.pfx in this example).
Extract the RDP certificate from the PFX file:
$ openssl pkcs12 -in dc1.pfx -clcerts -nokeys -out cert.pem
Enter Import Password:
The command above will ask for the import password, this is the password we typed in Step 2.
Extract the RDP private key from the PFX file:
$ openssl pkcs12 -in dc1.pfx -nocerts -out key.pem
Enter Import Password:
Enter PEM pass phrase:
Verifying - Enter PEM pass phrase:
The above command will ask for the import password again, as well as a PEM password. Remember this private key passphrase, — we will need it when we add the RDP certificate to Firepower.
4. Import the RDP key into Firepower
At this point, you should have the RDP cert "cert.pem," as well as the encrypted RDP private key "key.pem."

Navigate to Objects -> Object Management.
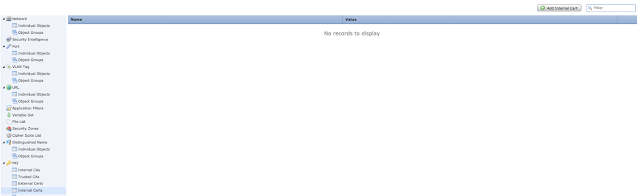

Select "Add Internal Cert" on the top right.
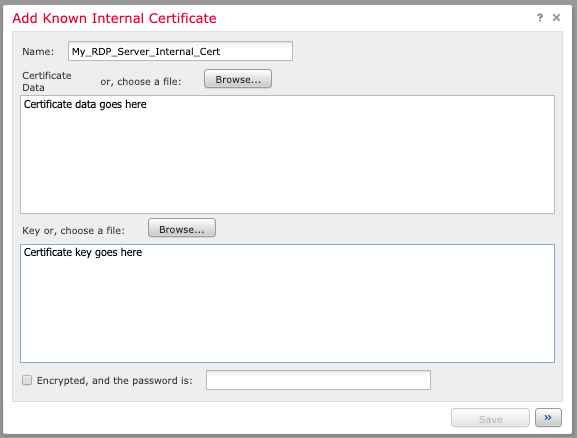
Name the certificate (e.g. the server name) and either paste in the "cert.pem" or browse to the "cert.pem" file in the "Certificate Data" section. Do the same for "key.pem" in the "Key" section. Click the "Encrypted" box and type in the PEM password from Step 3.
You have successfully imported the RDP certificate and private key. Now, create an SSL policy for decryption.
5. Create an SSL policy
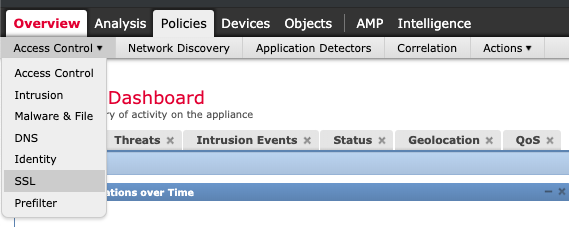
Navigate to Policies -> SSL
Select "New Policy."
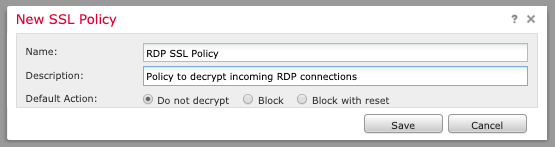
Enter a policy name and description with default action "Do not decrypt."

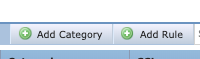
Once the policy editor has loaded, select "Add Rule" (top right).
Name the rule and give it the action "Decrypt - Known Key." Click the "with" field and select the certificate you imported earlier in Step 4.
If applicable, select "Source" and "Destination" networks or leave them as "any."
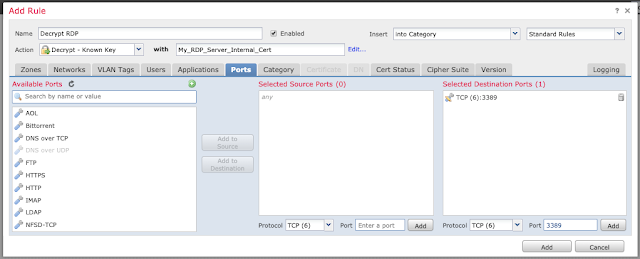
Click on the "Ports" tab and input the TCP port 3389 (if appropriate for your environment) under "Selected Destination Ports" and click "Add."

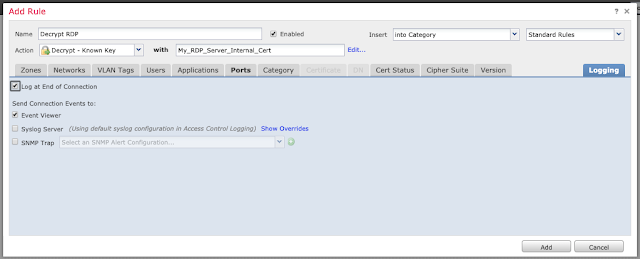
Under the "Logging" tab, enable logging at the end of the connection if desired.
Click "Add" and then "Save" to save the rule.
Additional SSL documentation is available here.
6. Enable the Intrusion Prevention Rule for BlueKeep

Navigate to Policies -> Access Control -> Intrusion Prevention.
Edit the desired Intrusion Policy.
Filter for Snort ID 50137 "OS-WINDOWS Microsoft Windows RDP MS_T120 channel bind attempt."
Click the checkbox and select Rule State -> Drop and Generate Events.
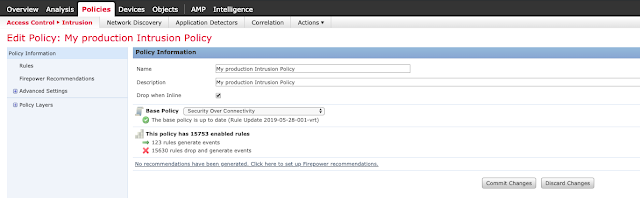
Click "Policy Information" and commit changes.
7. Configure the Access Control Policy
Navigate to Policies -> Access Control and edit the relevant Access Control Policy.
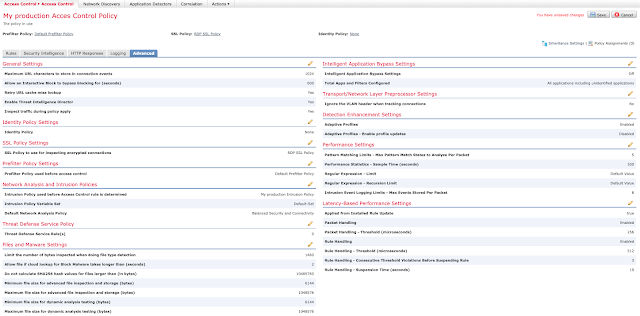
Under the "Advanced" tab, edit "SSL Policy Settings."
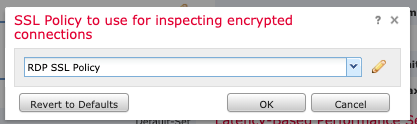
Select the SSL Policy we created in Step 5 and click "OK."

Ensure that your Intrusion Prevention Policy is selected under "Intrusion Policy used before Access Control rule is determined" in the "Network Analysis and Intrusion Policies" section of the "Advanced" tab.
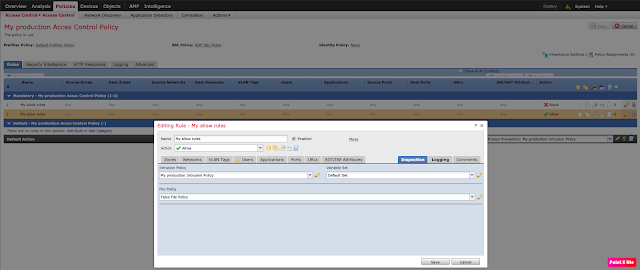
Under the "Rules" tab of your Access Control Policy, ensure you have an appropriate Intrusion Policy set for any "Allow" rules.
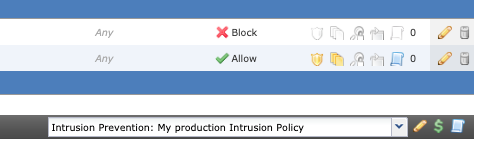
If appropriate, enable the Intrusion Prevention Policy for your Default Action, as well.

Save and deploy changes.
Verify RDP connectivity and functionality.
Encrypted Exploit in Action Let's start this by walking through what happens when the exploit is attempted on an unpatched, unprotected Windows 7 system.
As you can see, when the exploit is launched, it results in a denial of service on the system, as expected. Now we will demonstrate the process once you have enabled the SSL decryption for RDP, described in this blog, and leverage the detection capabilities of Firepower.
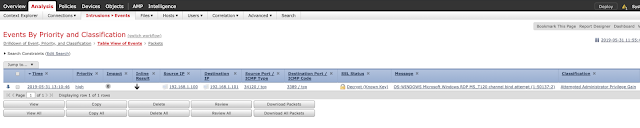
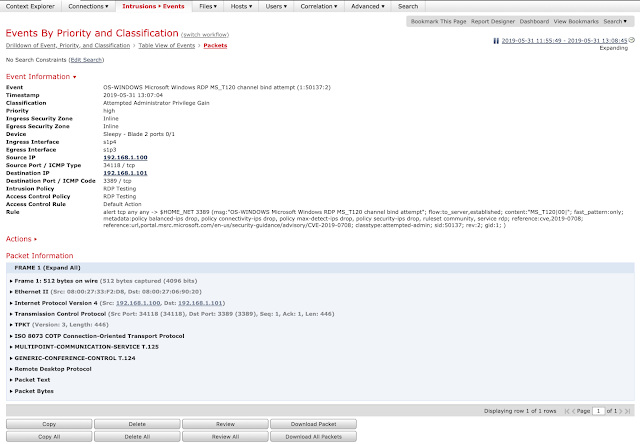
In this instance, no denial of service occurs and the system is unaffected, despite the attack being encrypted. Below is a screen capture showing SID 50137 alerting and dropping the encrypted BlueKeep exploit in Firepower.
Conclusion
Over the last several years we have seen several high profile vulnerabilities affecting services associated with various Windows services. Some, if not all, of these services should not be exposed to the internet. To reduce external exposure organizations need to take additional steps to ensure that services like RDP and SMB are not exposed unless explicitly required, but does not eliminate the need for patching. This is yet another example of why patching is one of the core fundamental concepts in information security. Vulnerabilities this severe appear periodically, and organizations need to be prepared to respond in a variety of different ways. Patching takes time and making sure that you have detection and prevention in place can require varying levels of difficulty. In this particular example, in order to get a higher level of visibility, SSL decryption is required for more thorough protections.
As encryption becomes more ingrained in the internet and more applications take advantage of it, these types of steps are going to become more common. Adversaries are always going to look for ways to evade any type of detection and using encryption is a great way to evade some of these technologies. Regardless, Cisco Talos will always be looking at the ways adversaries are operating and developing new and clever techniques to defeat them.